Data classification with Microsoft SQL Server and Azure SQL DB (GDPR, PII, HIPPA...etc)
On-premise or IaaS SQL Server
In order to use the data classification features of SQL Server, there are some requirements:- The Data Classification feature is available for SQL Server 2008 +
- The Data Classification feature requires SQL Server Management Studio (SSMS) 17.5 +
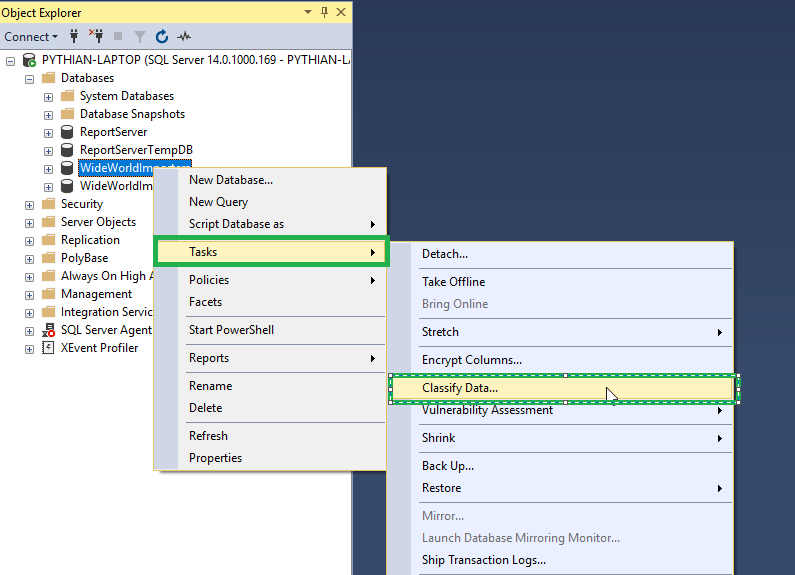
- In order to access the Data Classification feature, we need to open the database section and right click on the database we want to use. Then click Tasks and Classify Data.
- Next, it will display a blank report as we have not yet determined the classification of our columns. In order to do this, Microsoft attempts to discover and classify the columns on our behalf. We MUST review the recommendations and confirm the classification of the columns. We can do this by clicking on this message on top of the screen. We can then go through each column to check that the information type and sensitivity level is correct. Once we are happy with classification, we can click Accept selected recommendation button. Once that is complete, we just need to click the Save button.
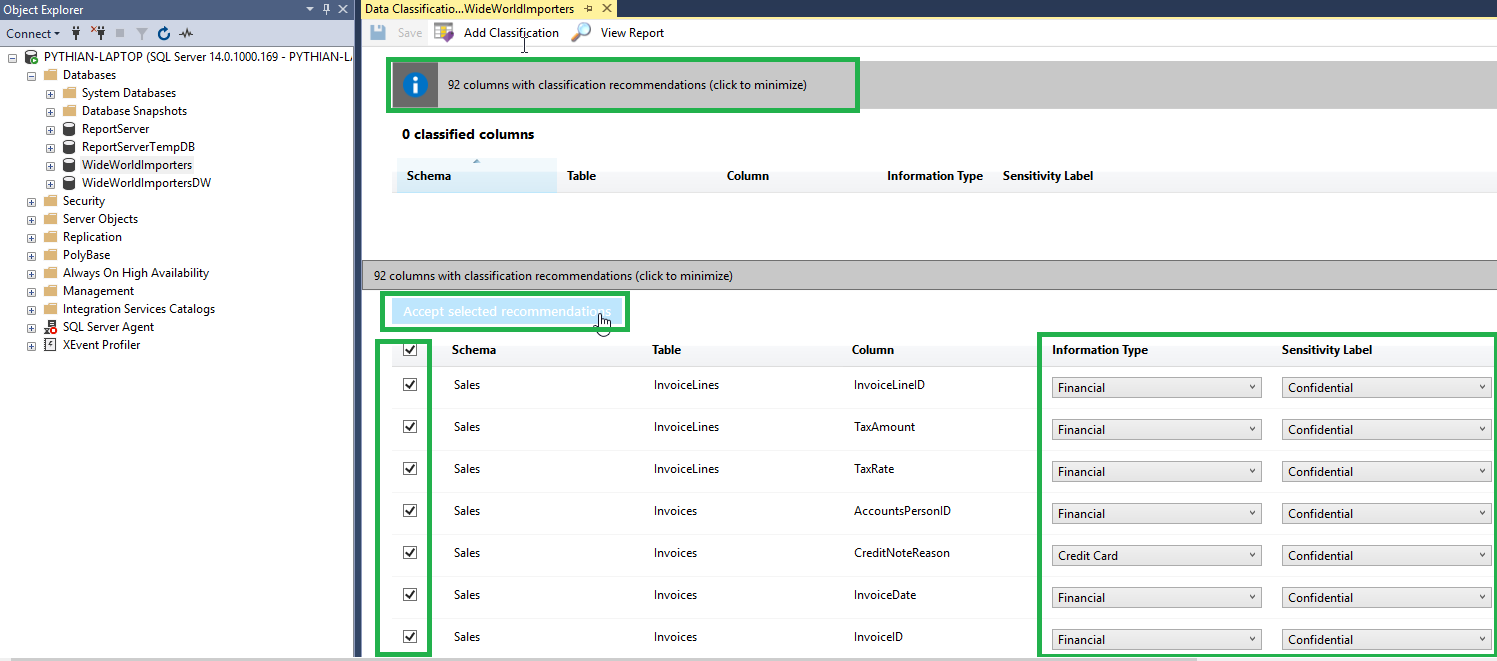
- Alternatively, we can classify columns manually by clicking on the Add Classification button and filling in the details as required.

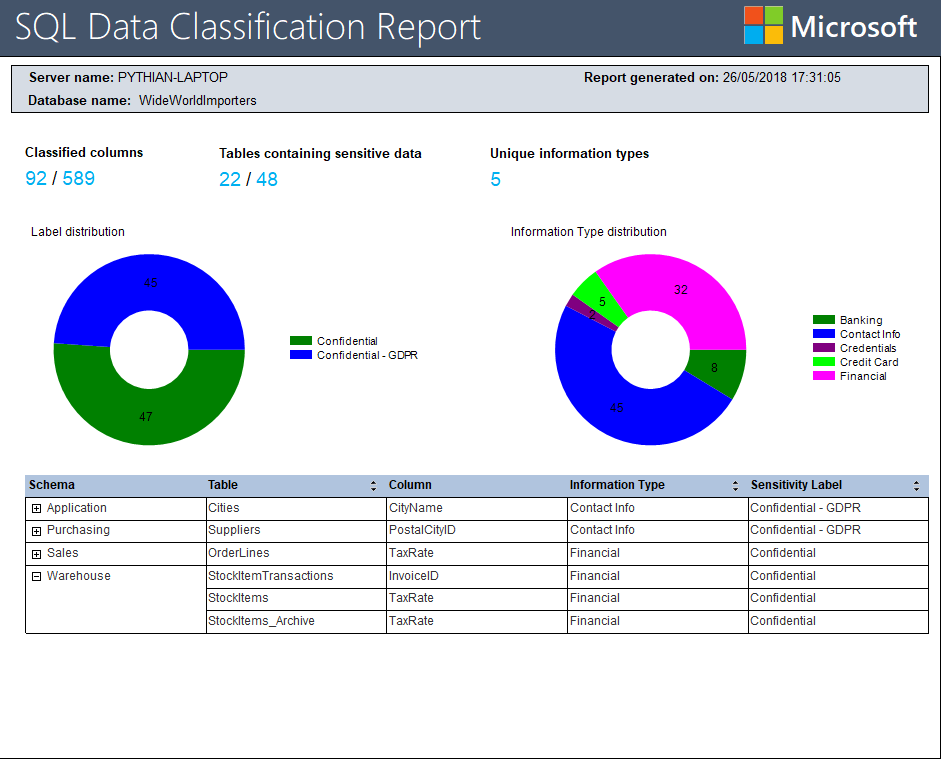
- Once we have accepted and saved the recommendations, we have successfully classified our data. We can view a nice report by clicking on the View Report Button. The report gives us some summary information regarding how many classified columns we have, how many tables we have that hold sensitive data and how many distinct information types we have. The report also gives us some attractive graphs to display the data. If needed, we can drill down and find column information in more detail towards the bottom of the report. We can also right click on the report and export to PDF, Word or Excel, which is super useful for presenting to executives.
Azure SQL DB
We can achieve the same result in Azure SQL DB by using the Azure portal:- First, we need to enable the Advanced Threat Protection for the database server. Please be aware there is a cost associated with this but it does offer a few benefits such as data discovery and classification, vulnerability assessment and threat detection capabilities. More information can be found here. We can enable this by clicking on the Enable Advanced Threat Detection button in the database blade of the Azure portal.
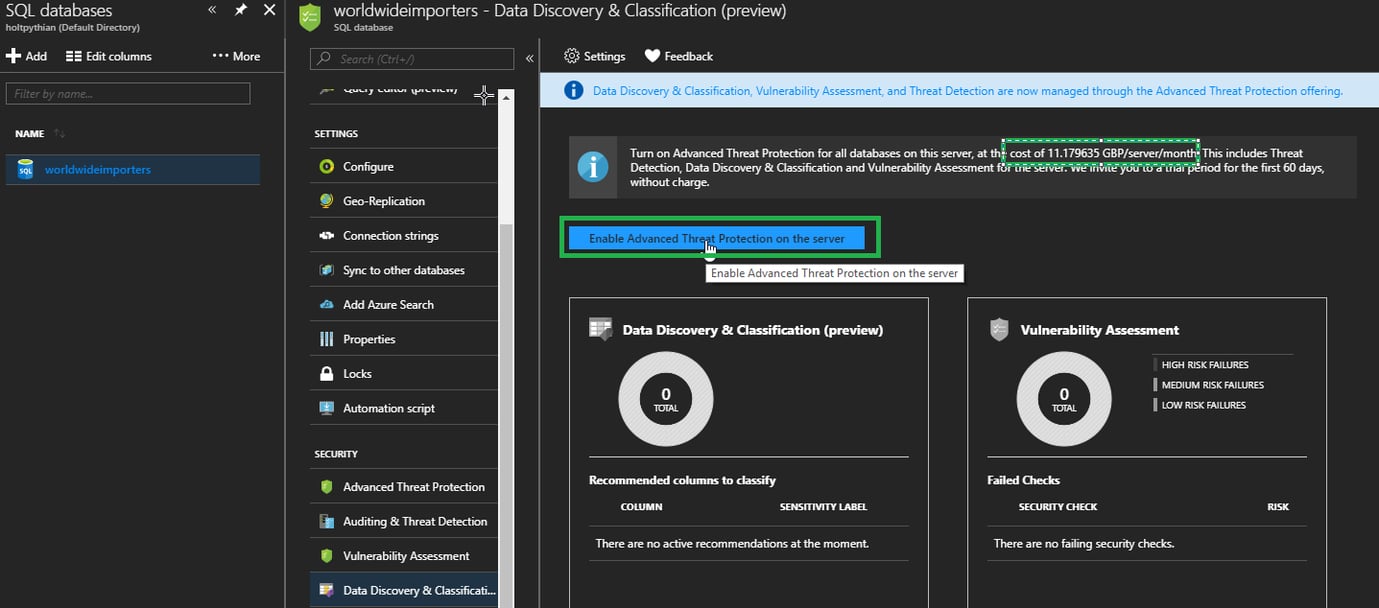
- Next, we need to click on the Data Discovery and Classification blade.
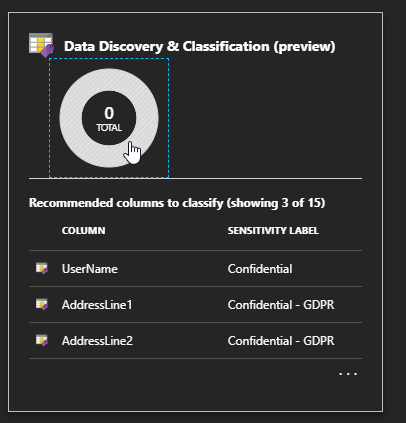
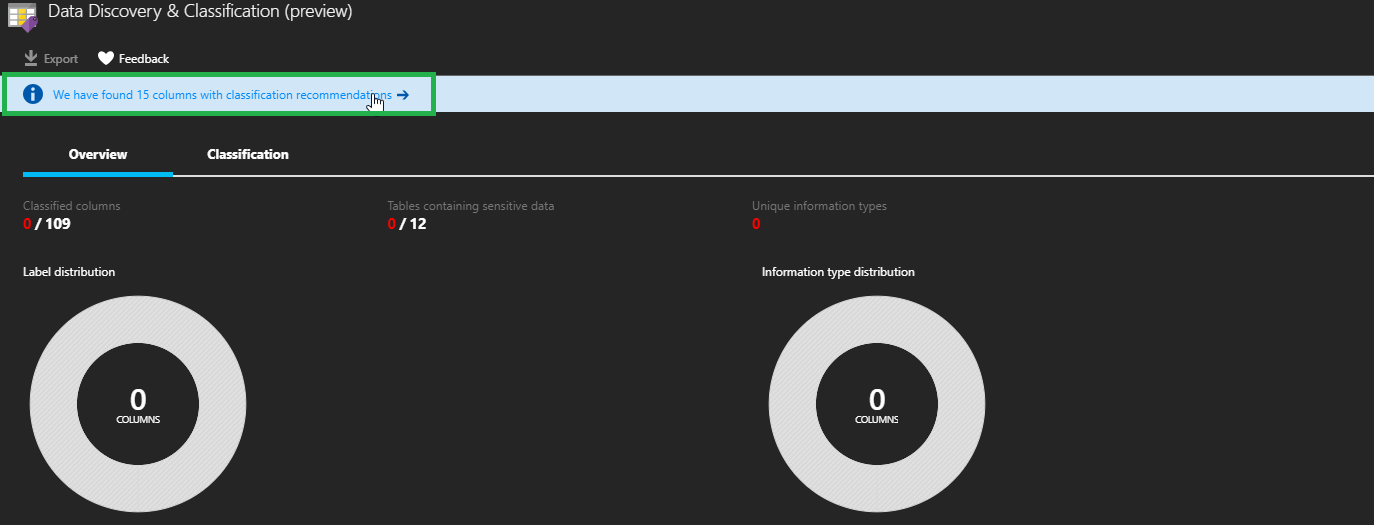
- Similar to SSMS, we must review and save the recommendations by clicking on the recommendation bar at the top of the blade.
- Now we can review, make any changes and accept the recommendations as required. After accepting the recommendation, we will need to save the classifications using the Save button.
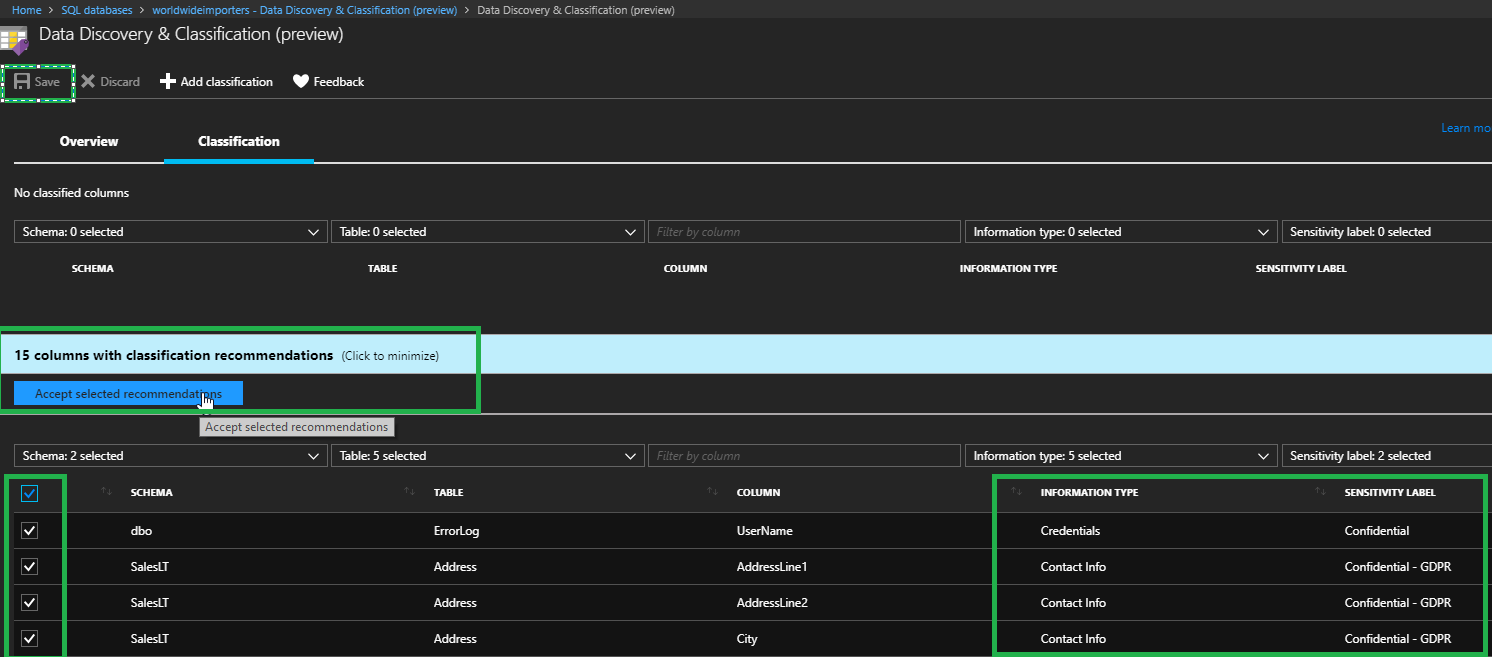
- Alternatively, we can add our own classifications by clicking on the Add Classification button.

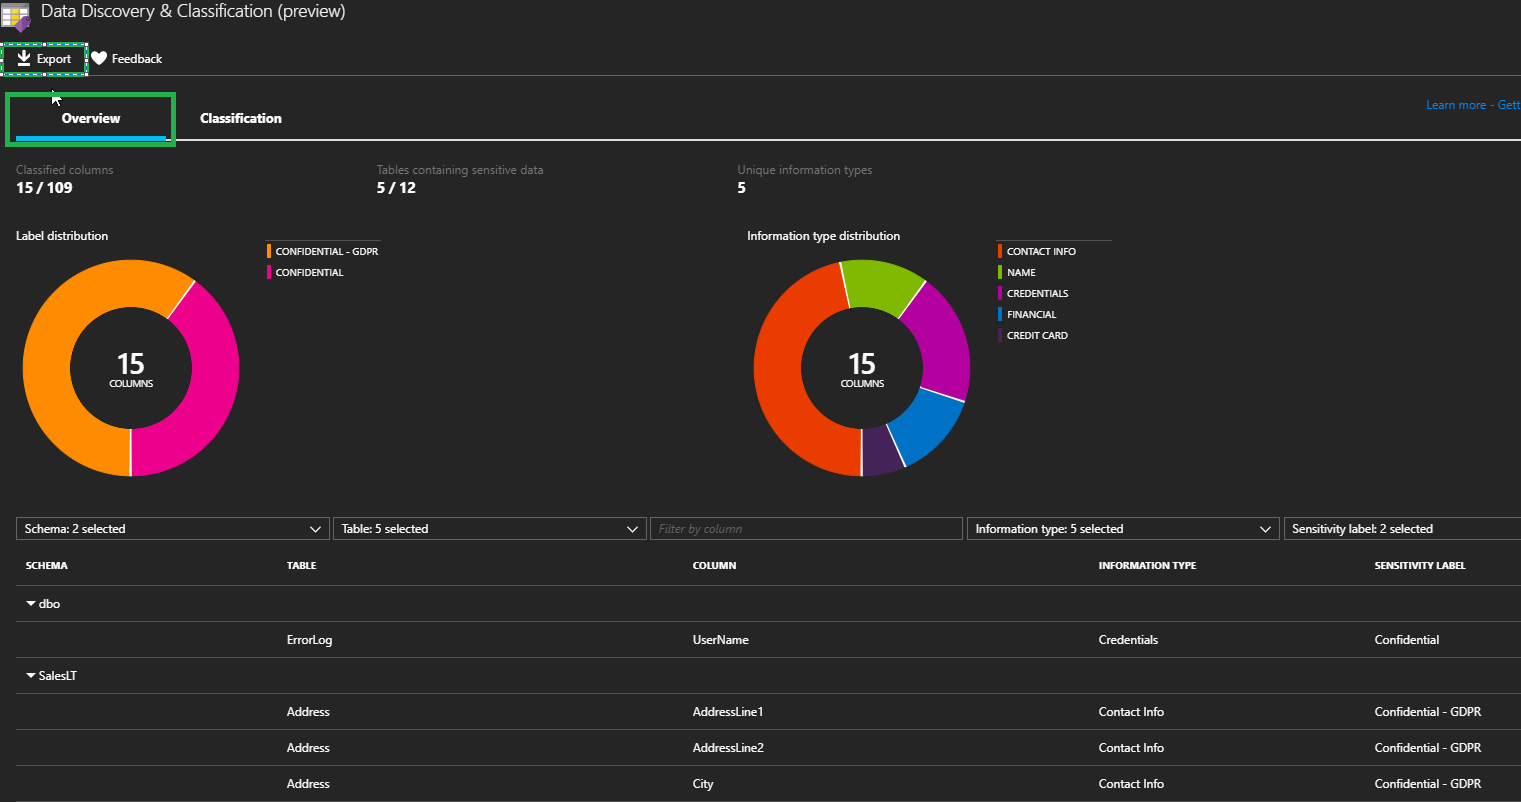
- After clicking on Save, the report is ready to be viewed and can be accessed by clicking on the Overview tab. It can also be exported using the Export button.
Conclusion
As you can see, Microsoft has really made the discovery and classification of our data quite easy with these new features. This helps us get started and maintain governance when relating to regulatory requirements. If you're interested in learning more, I invite you to comment below or contact us through the Pythian website.On this page
Share this
Share this
More resources
Learn more about Pythian by reading the following blogs and articles.
Migrate RDB to Cloud SQL Using Google’s Dataflow

Migrate RDB to Cloud SQL Using Google’s Dataflow
Jan 13, 2022 12:00:00 AM
2
min read
Archive Read-Only Data from RDS SQL Server to Partitioned S3 Buckets
![]()
Archive Read-Only Data from RDS SQL Server to Partitioned S3 Buckets
May 25, 2021 12:00:00 AM
24
min read
How to Install a Clustered SQL Server 2012 Instance – Part 4
![]()
How to Install a Clustered SQL Server 2012 Instance – Part 4
Jan 10, 2014 12:00:00 AM
7
min read
Ready to unlock value from your data?
With Pythian, you can accomplish your data transformation goals and more.
