Pythian Blog: Technical Track

Centralized authentication with Red Hat directory server for Linux systems

User management on Linux systems can be tedious, and when you add in more than 10 systems the chances are it is going to take a good amount of time for you to manage user accounts on all systems individually. There are various tools available to overcome this, and all of these use LDAP in some way. The same goes for Red Hat Directory Server, which is an extension of LDAP by Red Hat to provide centralized user management. Though I have primarily demonstrated integration with Red Hat Directory Server with Linux systems, it can be used on all systems which supports LDAP authentication. You can find the official Red Hat Directory Server installation guide here. For our test scenario I used two RHEL 5 servers named as Server101 which is the Red Hat Directory Server and Server201 which is the client. For RHEL based systems you need to make sure that you are subscribed to RHDS repo for installing Red Hat Directory Server. If you are using CentOS or other derivatives you can use 389-Directory Server which is upstream for Red Hat Directory Server. Once you have the prerequisite ready you can start with installation.

Installing Red Hat Directory Server

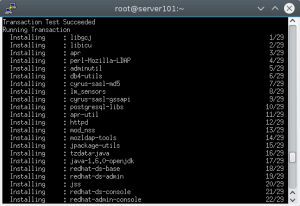
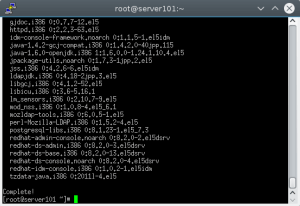
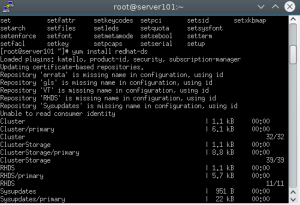
I have designated server101 as Red Hat Directory Server. Below are the steps to Install packages required for Red Hat Directory Server. [root@server101 ~]#yum install redhat-ds -y [caption id="attachment_85285" align="alignnone" width="300"] yum install redhat-ds Installing RHDS[/caption] RHDS005 RHDS006   Once the installation is complete we can move to configuring Red Hat Directory Server.  
Configuring Red Hat Directory Server

 
[root@server101 ~]# setup-ds-admin.pl
Once you run this command you will be prompted for inputs by the setup script which are mostly straight forward. But there are few things that need to be taken care of before we proceed with the configuration. We want to run the ldap service as ldap user, so create ldap user and group if its not there. Then open the below ports on your firewall/iptables so that directory server can work properly.
  • 389 for LDAP service
  • 686 for secure LDAP service
  • 9830 for directory server admin console connectivity
You should also increase the number of file descriptors as it can help Red Hat Directory Server access files more efficiently. Editing the maximum number of file descriptors the kernel can allocate can also improve file access speeds.
  • First, check the current limit for file descriptors in /proc/sys/fs/file-max
  • If the setting is lower than 64000, edit the /etc/sysctl.conf file, and reset the fs.file-max parameter and set it to 64000 or up.
  • Then increase the maximum number of open files on the system by editing the /etc/security/limits.conf configuration file. Add the following entry
    * - nofile 8192
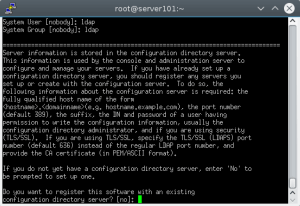
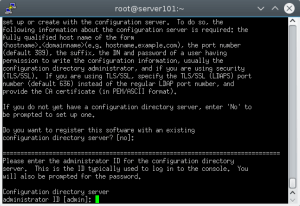
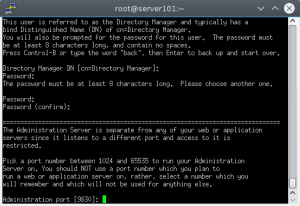
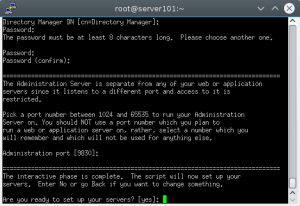
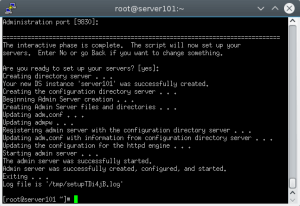
  After this we can start configuring Red Hat Directory Server with setup-ds-admin.pl command. Once it is executed it will prompt for inputs which are mostly self explanatory, like below. Mostly we will accept the default values, as this is a fresh installation. We will only change the system user and group which will run ldap service from nobody to ldap user we created earlier. Don't forget to make a note of passwords for admin and Directory Manager as it will be used to login to Admin Console.   [root@server101 ~]# setup-ds-admin.pl -k ============================================================================== This program will set up the Red Hat Directory and Administration Servers. It is recommended that you have "root" privilege to set up the software. Tips for using this program: - Press "Enter" to choose the default and go to the next screen - Type "Control-B" then "Enter" to go back to the previous screen - Type "Control-C" to cancel the setup program Would you like to continue with set up? [yes]: yes ============================================================================== BY SETTING UP AND USING THIS SOFTWARE YOU ARE CONSENTING TO BE BOUND BY AND ARE BECOMING A PARTY TO THE AGREEMENT FOUND IN THE LICENSE.TXT FILE. IF YOU DO NOT AGREE TO ALL OF THE TERMS OF THIS AGREEMENT, PLEASE DO NOT SET UP OR USE THIS SOFTWARE. Do you agree to the license terms? [no]: yes ============================================================================== Your system has been scanned for potential problems, missing patches, etc. The following output is a report of the items found that need to be addressed before running this software in a production environment. Red Hat Directory Server system tuning analysis version 10-AUGUST-2007. NOTICE : System is i686-unknown-linux2.6.18-308.el5 (1 processor). WARNING: 502MB of physical memory is available on the system. 1024MB is recommended for best performance on large production system. NOTICE: The net.ipv4.tcp_keepalive_time is set to 7200000 milliseconds (120 minutes). This may cause temporary server congestion from lost client connections. WARNING: There are only 1024 file descriptors (hard limit) available, which limit the number of simultaneous connections. WARNING: There are only 1024 file descriptors (soft limit) available, which limit the number of simultaneous connections. Would you like to continue? [no]: yes ============================================================================== Choose a setup type: 1. Express Allows you to quickly set up the servers using the most common options and pre-defined defaults. Useful for quick evaluation of the products. 2. Typical Allows you to specify common defaults and options. 3. Custom Allows you to specify more advanced options. This is recommended for experienced server administrators only. To accept the default shown in brackets, press the Enter key. Choose a setup type [2]: ============================================================================== Enter the fully qualified domain name of the computer on which you're setting up server software. Using the form <hostname>.<domainname> Example: eros.example.com. To accept the default shown in brackets, press the Enter key. Computer name [server101.suratlug.org]: server101.example.com ============================================================================== The servers must run as a specific user in a specific group. It is strongly recommended that this user should have no privileges on the computer (i.e. a non-root user). The setup procedure will give this user/group some permissions in specific paths/files to perform server-specific operations. If you have not yet created a user and group for the servers, create this user and group using your native operating system utilities. System User [nobody]: ldap System Group [nobody]: ldap ============================================================================== Server information is stored in the configuration directory server. This information is used by the console and administration server to configure and manage your servers. If you have already set up a configuration directory server, you should register any servers you set up or create with the configuration server. To do so, the following information about the configuration server is required: the fully qualified host name of the form <hostname>.<domainname>(e.g. hostname.example.com), the port number (default 389), the suffix, the DN and password of a user having permission to write the configuration information, usually the configuration directory administrator, and if you are using security (TLS/SSL). If you are using TLS/SSL, specify the TLS/SSL (LDAPS) port number (default 636) instead of the regular LDAP port number, and provide the CA certificate (in PEM/ASCII format). If you do not yet have a configuration directory server, enter 'No' to be prompted to set up one. Do you want to register this software with an existing configuration directory server? [no]: ============================================================================== Please enter the administrator ID for the configuration directory server. This is the ID typically used to log in to the console. You will also be prompted for the password. Configuration directory server administrator ID [admin]: Password: Password (confirm): ============================================================================== The information stored in the configuration directory server can be separated into different Administration Domains. If you are managing multiple software releases at the same time, or managing information about multiple domains, you may use the Administration Domain to keep them separate. If you are not using administrative domains, press Enter to select the default. Otherwise, enter some descriptive, unique name for the administration domain, such as the name of the organization responsible for managing the domain. Administration Domain [example.com]: ============================================================================== The standard directory server network port number is 389. However, if you are not logged as the superuser, or port 389 is in use, the default value will be a random unused port number greater than 1024. If you want to use port 389, make sure that you are logged in as the superuser, that port 389 is not in use. Directory server network port [389]: ============================================================================== Each instance of a directory server requires a unique identifier. This identifier is used to name the various instance specific files and directories in the file system, as well as for other uses as a server instance identifier. Directory server identifier [server101]: ============================================================================== The suffix is the root of your directory tree. The suffix must be a valid DN. It is recommended that you use the dc=domaincomponent suffix convention. For example, if your domain is example.com, you should use dc=example,dc=com for your suffix. Setup will create this initial suffix for you, but you may have more than one suffix. Use the directory server utilities to create additional suffixes. Suffix [dc=example, dc=com]: ============================================================================== Certain directory server operations require an administrative user. This user is referred to as the Directory Manager and typically has a bind Distinguished Name (DN) of cn=Directory Manager. You will also be prompted for the password for this user. The password must be at least 8 characters long, and contain no spaces. Press Control-B or type the word "back", then Enter to back up and start over. Directory Manager DN [cn=Directory Manager]: Password: Password (confirm): ============================================================================== The Administration Server is separate from any of your web or application servers since it listens to a different port and access to it is restricted. Pick a port number between 1024 and 65535 to run your Administration Server on. You should NOT use a port number which you plan to run a web or application server on, rather, select a number which you will remember and which will not be used for anything else. Administration port [9830]: ============================================================================== The interactive phase is complete. The script will now set up your servers. Enter No or go Back if you want to change something. Are you ready to set up your servers? [yes]: Creating directory server . . . Your new DS instance 'server101' was successfully created. Creating the configuration directory server . . . Beginning Admin Server creation . . . Creating Admin Server files and directories . . . Updating adm.conf . . . Updating admpw . . . Registering admin server with the configuration directory server . . . Updating adm.conf with information from configuration directory server . . . Updating the configuration for the httpd engine . . . Starting admin server . . . The admin server was successfully started. Admin server was successfully created, configured, and started. Exiting . . . Log file is '/tmp/setupZa3jGe.log' [root@server101 ~]# RHDS012 RHDS013 RHDS020 RHDS021 RHDS022   Now that we have installed and configured Red Hat Directory Server its not set to autostart during system boot. So we need to make Red Hat directory service and redhat directory console admin service to start at boot.
[root@server101 ~]# chkconfig dirsrv-admin --list 
 dirsrv-admin 0:off1:off2:off3:off4:off5:off6:off 
 [root@server101 ~]# chkconfig dirsrv --list 
 dirsrv 0:off1:off2:off3:off4:off5:off6:off 
 [root@server101 ~]# chkconfig dirservrv on 
 [root@server101 ~]# chkconfig dirsrv-admin on 
 [root@server101 ~]#
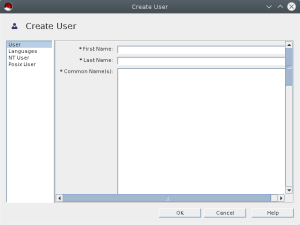
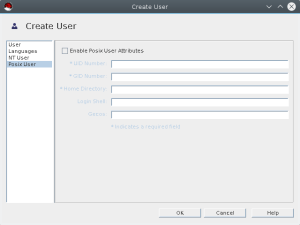
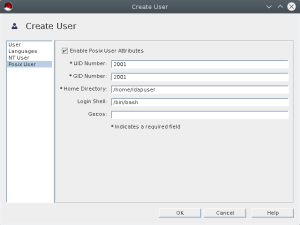
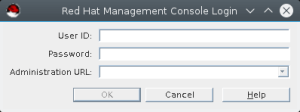
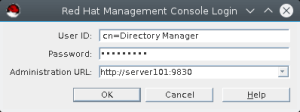
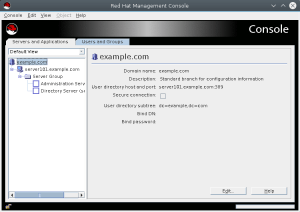
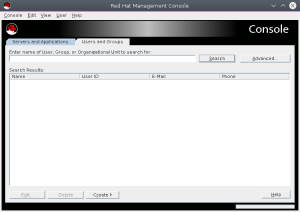
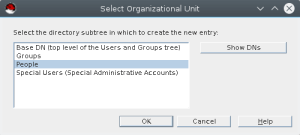
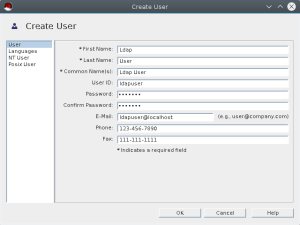
Now that we have our server ready, we need to add a user to it. We will use Directory Server admin console to connect to the GUI and will create ldap user from there. We can invoke directory server admin console gui with redhat-idm-console. It will open a GUI like below. [caption id="attachment_85377" align="alignnone" width="300"] Directory Server Admin Console GUI Directory Server Admin Console GUI[/caption] The user id is directory manager which was created during directory server setup, mostly it will be default as cn=Directory Manager. Now put your password and Administration url as https://server101:9830. [caption id="attachment_85379" align="alignnone" width="300"] Directory Server Admin Console Directory Server Admin Console[/caption] Once you login you will be presented with console screen as below. RHDS051 Now click on Users and Groups tab and then click on create button, there select user from the menu. RHDS031 RHDS032 Now Select organizational unit, mostly we will use the default and will select people from the list as below. RHDS033 It will open Create User menu. RHDS034 Now we will create ldapuser account as shown below. Fill in required details. Also select posix user tab as we need the account for unix system login. Fill up required details for posix account as well. RHDS035 RHDS036 RHDS037 Now that we have created user account we can start configuring client.  
Configuring Linux client for LDAP login

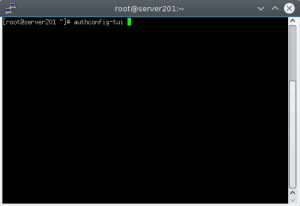
I have created server201 which we will configure for LDAP login. For that we need to execute authconfig-tui from console. It will open a terminal ui to configure authconfig to use LDAP.
[root@server201 pam.d]# authconfig-tui
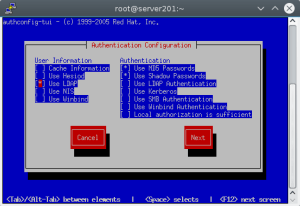
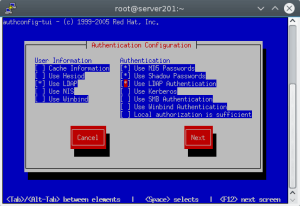
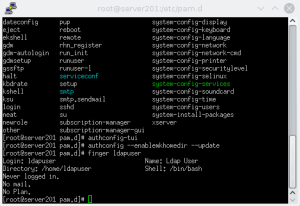
RHDS040 Select Use LDAP for user information. RHDS041 Select Use LDAP Authentication. RHDS042 After this we need to make sure when user login on the server with LDAP authentication the home dir is created automatically, which is not enabled by default. We can do this by executing below command at console. [root@server201 pam.d]# authconfig --enablemkhomedir --update RHDS052 Once this is done you can now use your ldap user to login to client server. Now that we have created LDAP, we can use it to centralized login for all linux systems in the environment. The user management is easy from single location. We can also configure TLS and do replication for redundancy. We can define schema and policies as well but that is for another time.  
No Comments Yet

Let us know what you think

Subscribe by email